Login Graphically to A Computer in a Remote Location
The ability to login graphically into any computer from a remote location has a number of uses. In my case it allows me to create a setup where students in my school can easily login graphically into the universities computer lab and use many of the applications which are installed there (like Matlab which is only licensed to run on our lab computers) It also allows me to log into my work computer from home. To create this setup we would need a tool called Freenx.
FreeNX
FreeNX is a system that allows you to access your desktop from another machine over the Internet. You can use this to login graphically to your desktop from a remote location.
Advantages of FreeNX
One advantage of FreeNX is that it is based on the SSH Protocol so your packets are transferred over an encrypted channel which in human language means nasty people can’t see what you are doing and potentially compromise your computer
Installation
Installation FreeNX is in Two Phrase the server and the client
Server Installation
The server version is installed on the remote system you want to login to. To install the server version you need to add the following repository to your sources.list
Hardy Heron
deb http://ppa.launchpad.net/freenx-team/ubuntu hardy main

deb-src http://ppa.launchpad.net/freenx-team/ubuntu hardy main
Intrepid Ibex
deb http://ppa.launchpad.net/freenx-team/ubuntu intrepid main

deb-src http://ppa.launchpad.net/freenx-team/ubuntu intrepid main
Jaunty Jackalope
deb http://ppa.launchpad.net/freenx-team/ubuntu jaunty main

deb-src http://ppa.launchpad.net/freenx-team/ubuntu jaunty main
Now we add the public Key for the FreeNX PPA with:
sudo apt-key adv --recv-keys --keyserver keyserver.ubuntu.com 2a8e3034d018a4ce
and we install with:
sudo apt-get update ; sudo apt-get install freenx
That is all that is needed for the installation of freenx server on our remote machine.
Client Installation
The client is installed on the machine you want to login from.
There are Two type of FreeNX clients available the non free and open source version (and freedom hating version 🙂 ) and the free and open source version
The Non-free version
This is the official NX version and can not be installed from the Ubuntu repository but can be deb version for ubuntu can be downloaded from here
Double click to install.
Once installed you find it at Application-Internet-NX Client for Linux
The Free and Open Source version can be downloaded from the Ubuntu repository by running:
sudo apt-get install qtnx
Once installed you find it at Application-Internet-QTNX
Usage
What i really love about FreeNX is its usage, its very easy to use and all your do is launch the client which once installed can be found under /Application/Internet/Nx Client for LInux
Once you start the Program it displays a wizard which would guide you through the configuration process
=Session: First Thing you do is create a session which is like a profile of the remote machine you want to connect to. You can have many sessions of different remote machines which allows you to easily choose a session and login to the machine configure to the session.
Host: The IP address of the remote machine you want to login to
Select you Internet Type: Here is were you also get to indicate what type of internet connection you are running, NX compresses your data over the network so the slower your internet connection the higher the compression rate of your data (or so it seems) then you also put in the . Leave the port as 22 since that is the default that ssh uses (unless you have ssh using another port on the remote machine)
General Config
Desktop: Here you get you choose the platform the remote machine is running windows? *nix ? and also what graphical enviroment? kde, gnome ?
Display You are allowed to set how big you want the resolution of the remote machine to be on your current machine once you arte logged in.
Advanced Configuration
Here you have the ability to use a network proxy if you are behind a firewall, There are also option that allows you to disable encryption ( why would you ever want to do that) which is not advisable for security reasons.
Here you can enable services like samba share or cups printing between the remote machine and your current machine, in case you want to share files or print something from the remote machine. pretty neat hey 🙂
Once all the settings are configured to your taste. Its time to run your connection to the remote machine.
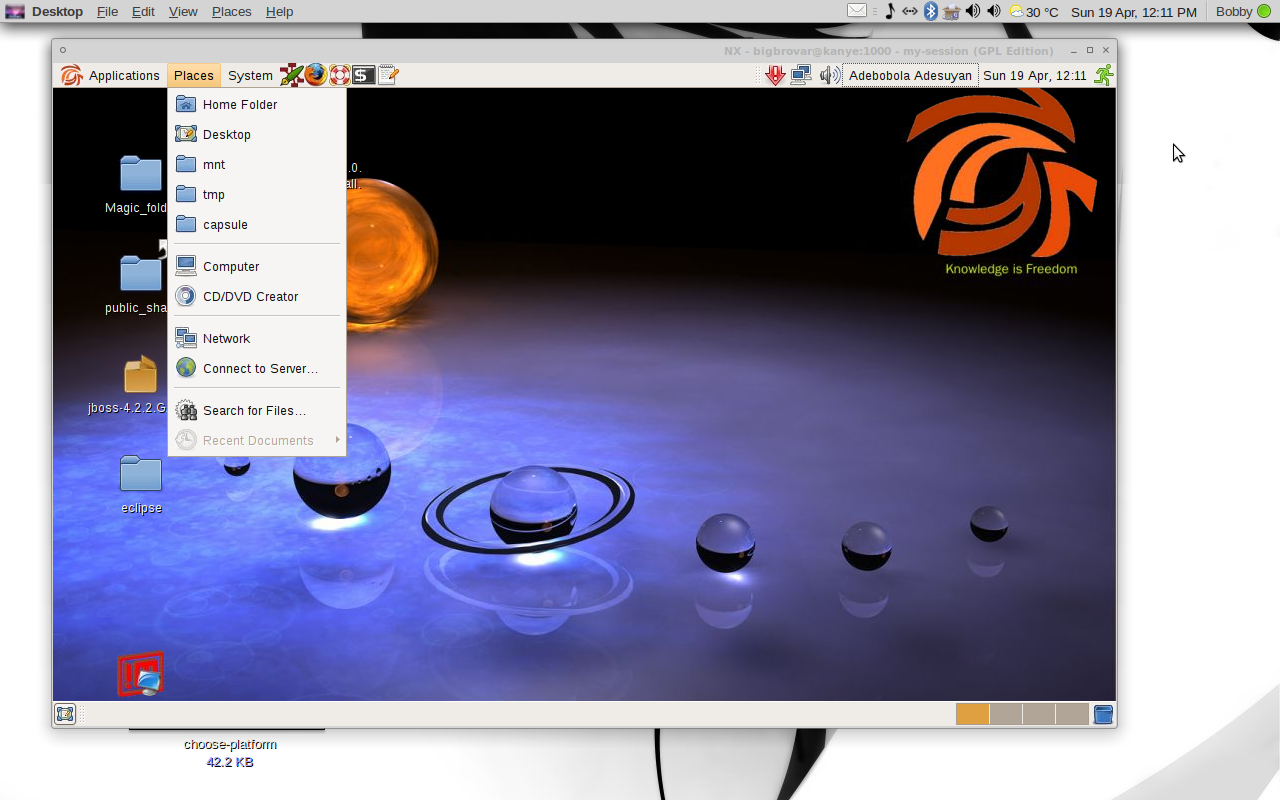
The end result is something similar to this
The remote machine will be running within a windows which can be minimized or resized, or moved to another work space while you continue work on your local machine.
Overall I find Freenx to be very useful and comes in very handy in my day to day work as a system administrator. Its cross platform which means you can even login to a windows machine from your linux box and vice versa.
Hope someone finds this useful