How I Built A Lithium Battery Bank for Solar-Inverter Energy Storage
Lithium-ion phosphate batteries, also known as LiFePO4 batteries, have become increasingly popular in recent years due to their high energy density, relatively stable safety record, and long cycle life. An Average LifePO4 battery can last for up to 10 years and even then 80% of its original capacity would still be available for use for another 5 years.
Lithium battery has a number of advantages over traditional Lead Acid Battery systems, these advantages make it particularly ideal for use as energy storage in an off-grid application.
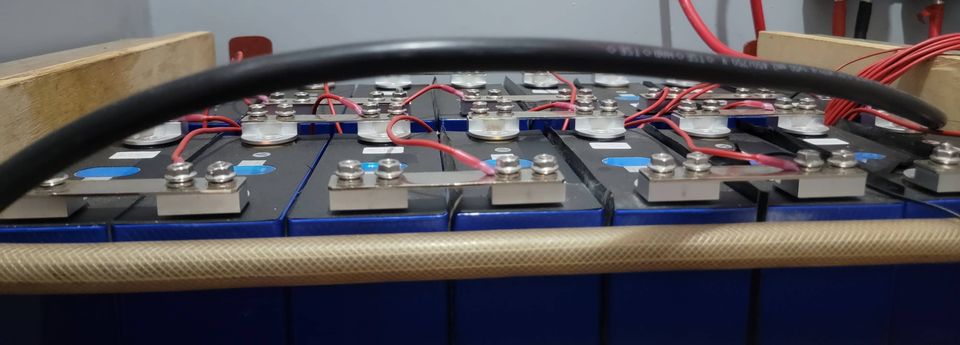
This post is a journal on how I built a 28kwh of battery storage based on lifepo4. I hope to document the process from ordering the batteries, the components I used, and how I built the batteries to support my Off-grid solar system.
LiFePo4 vs Lead Acid Batteries - Click here.
- Long life span (5-10 years) vs lead acid (1-3 years), depending on the depth of discharge and assuming that the cycle limit doesn't kill the battery first
- Longer cycle life, as LiFePO4 batteries, last 1,000 to 3,000 charge and discharge cycles, compared to similarly sized lead-acid batteries, which can range from 200 - 1000 cycles (again, assuming the depth of discharge is within recommended limits for both battery types).
- LiFePO4 batteries are less susceptible to problems caused by the depth of discharge...a LiFePO4 battery can be dropped to 20% of charge without long-term damage. Most lead-acid batteries lose capacity or cycle life if they're discharged more than 50%.
- Lighter than lead-acid batteries. Lithium often requires 60% less space when compared to same-sized Lead Acid Battery
- Higher rate of change and discharge. A lithium-ion battery can be safely charged and discharged at about 50% of its rated capacity. This means a 200 Ah lithium battery can be charged/discharged at about 100A. Lead acid on the other hand is designed more to be slowly charged and discharged often time at between 10-20% of its rated capacity.
- Very safe - the odds of a "thermal runaway" (aka battery fire) are very low. The same can not be said of other lithium-ion chemistries.
Cons:
- As mentioned, LiFePO4 batteries are costly.
- LiFePO4 batteries are hard to find. Most must be purchased online.
- Susceptible to damage via overcharging (it's very important to use a charging system that's designed for LiFePO4 batteries if you want to maximize their life).
Building a LifePo4 Battery Bank in Nigeria.
Setting up a Lifepo4-based battery bank in Nigeria requires careful planning and lots of patience. Readily made off the shelve lifepo4 batteries are available in Nigeria at different price points but this post is for those who would like to build their battery bank from scratch.
Why did I build a lifep04 battery bank vs buying one off the shelve?
The simple short answer is because I could.
The long answer is, I did not have much confidence in the quality of batteries available off the shelf in Nigeria and I had serious doubts about their capacity.
Planning and Research Stage.
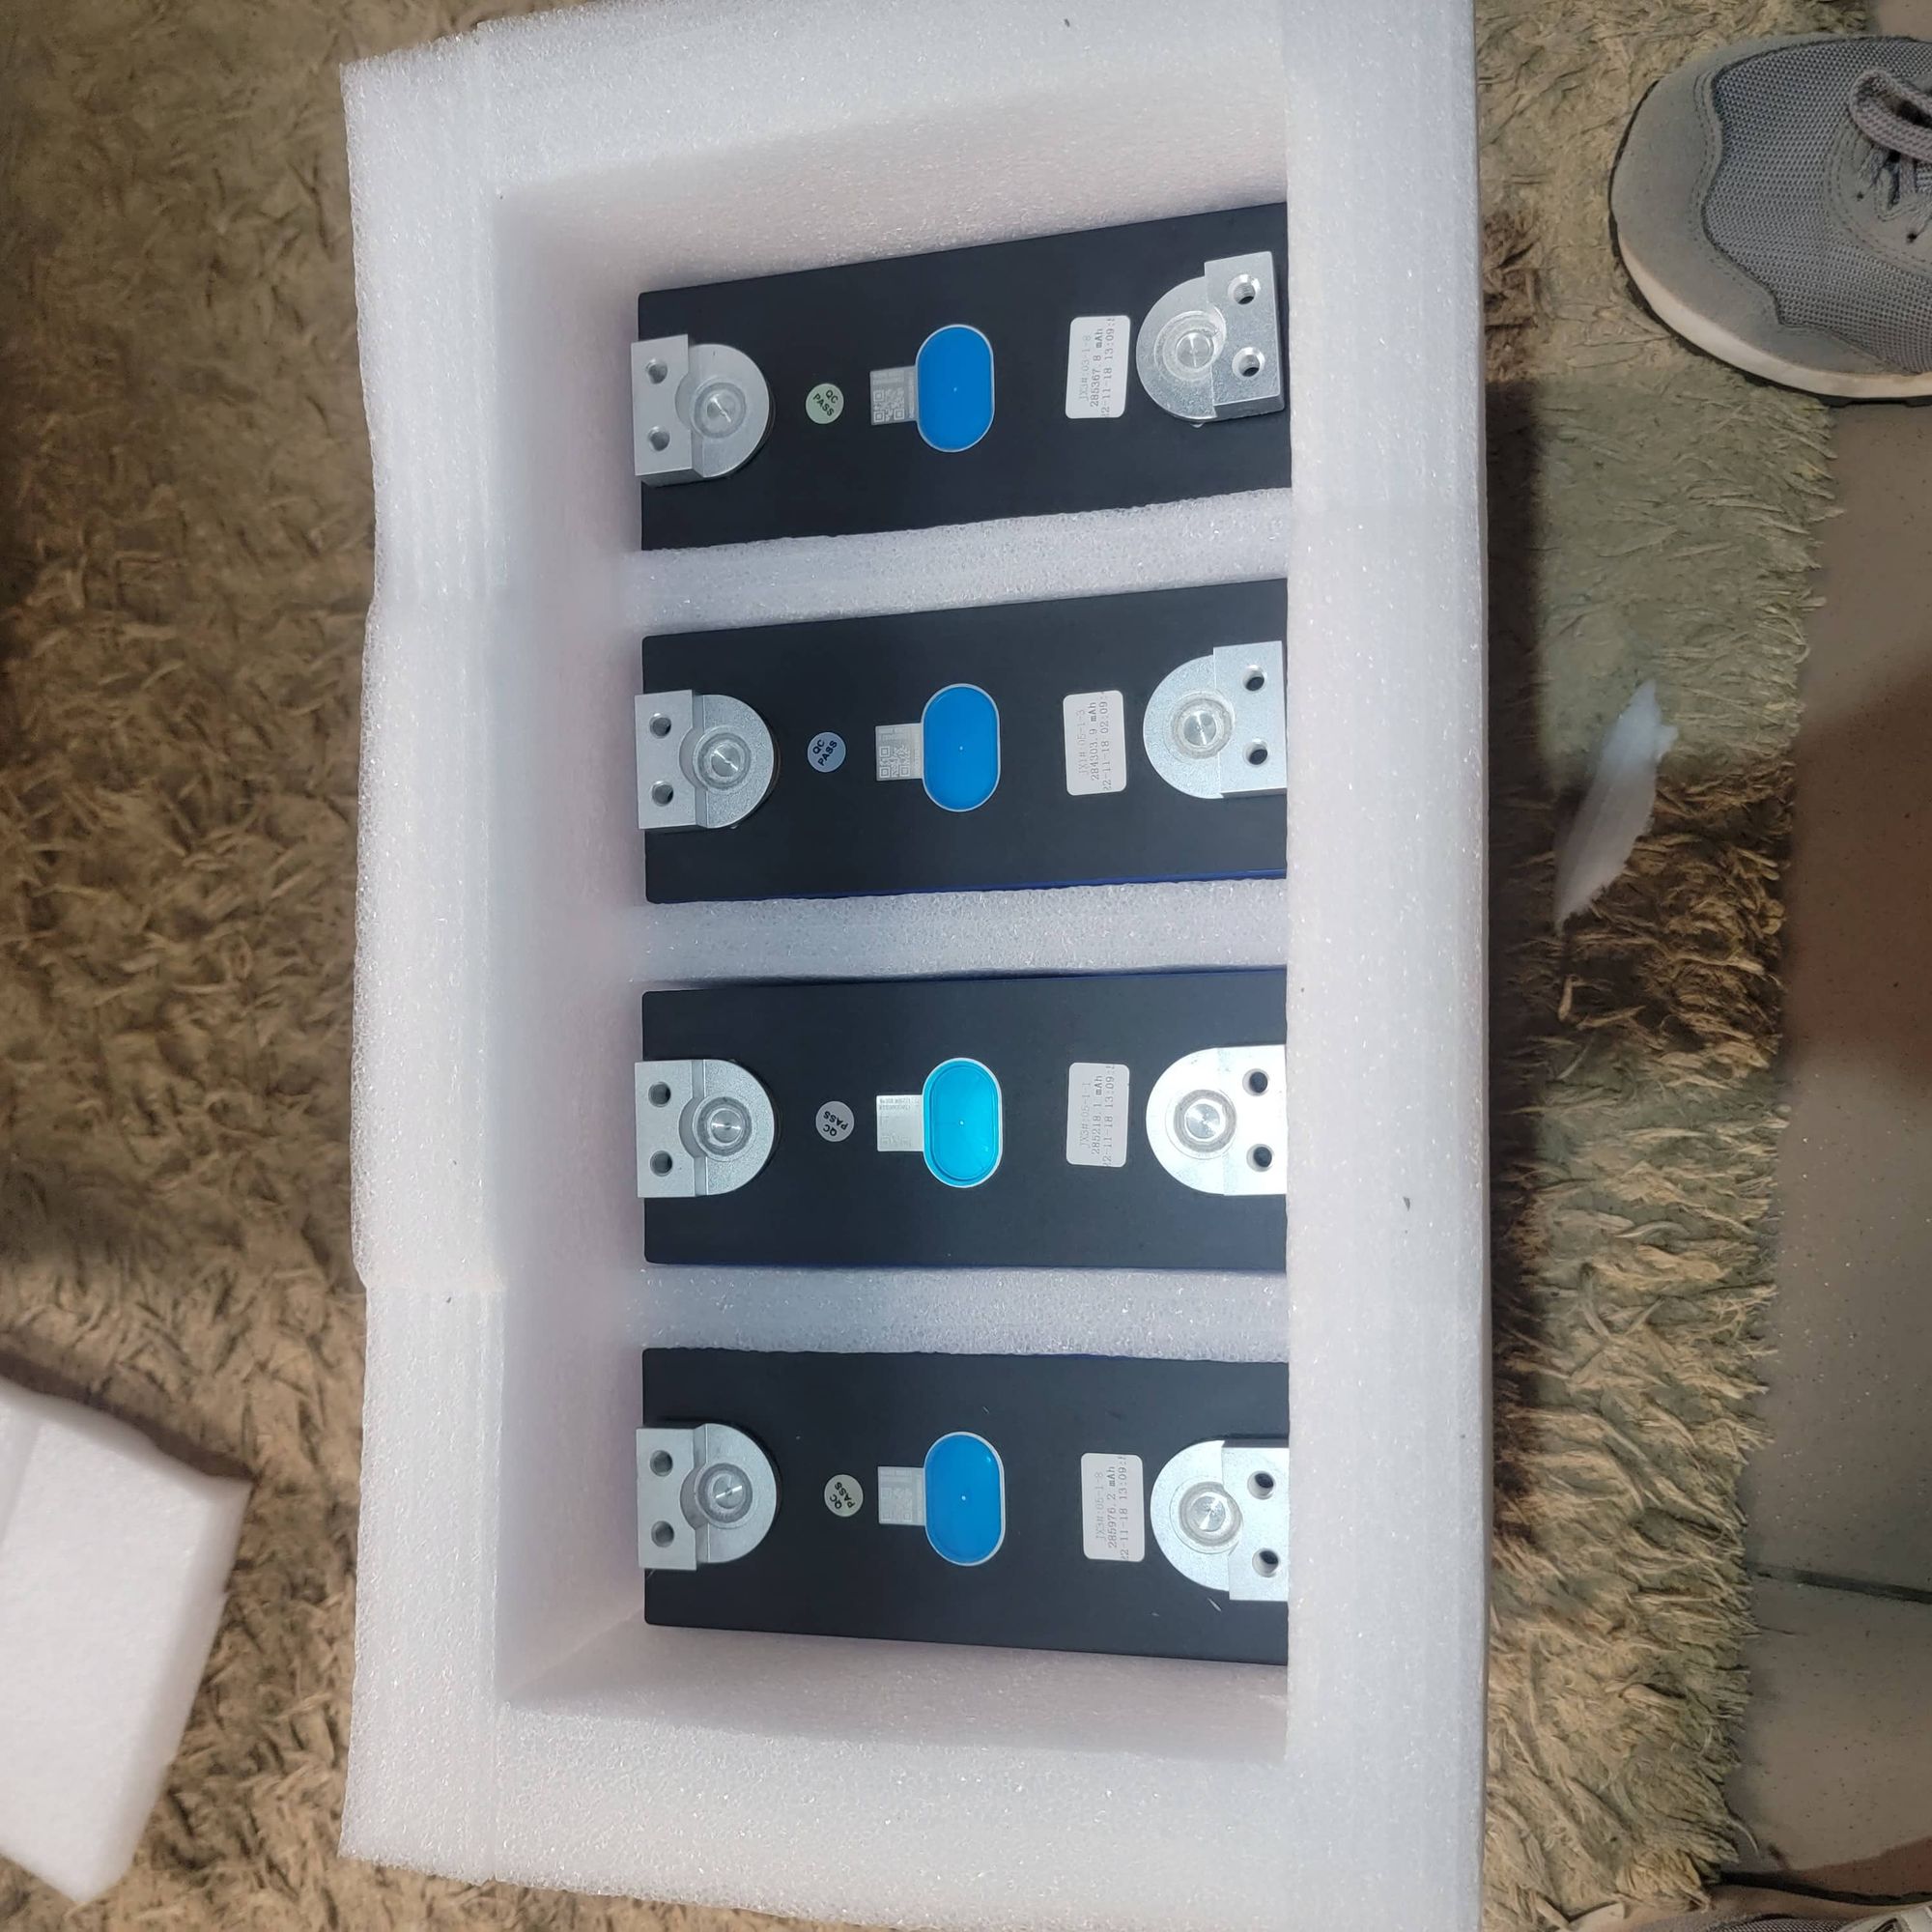
- Type of LifePo4 Cells, based on feedback by many users from my research on YouTube and on the popular DIYSolarforum. The most reliable lifepo4 brand is Eve. Their lf280k series was what I went with, again based on user reviews.
- Where I bought the batteries from. This was the most important problem I had to solve. I decided it was best to import directly to save cost and have a better chance of buying quality batteries. Alibaba.com is filled with different battery sellers but Caveat Emptor! In the end, I went with feedback and recommendation from other buyers, and in Nigeria, the number 1 source for getting Lithium from China seems to be Shenzhen Deriy New Energy Technology Co., Ltd.
Deriy New Energy handled the shipping and customs clearance and I only had to pick up from Lagos. - Battery Cost: I got 16 x 280Ah, 3.2v Battery - Eve LF280k for $105 x 16 plus about 205 for shipping.
Build essentials:
From my research, I realized they are lots of little (and not so little) things which would be required to carry out a successful lifep04 build. Fortunately, many of the components required in building a lifepo4 battery can be gotten in Nigeria, unfortunately, a lot of them would need to be imported from sites like Aliexpress and Amazon US. Here is the list of what helped me with a successful build.
- Battery Management System: This is the most important component of a lifePo4 battery bank outside of the batteries themselves. The BMS is connected to each cell that makes up the battery bank and it is meant to monitor cell voltage, and temperature ensuring that they are operating within their safety limits. The BMS can stop the battery from receiving charge or from discharging if any of the cells goes outside of their safe limits - this could be caused by over/under voltage or temperature issues like if a cell is too hot or cold. There are lots of BMS available, but you don't want to go cheap.
JK BMS and JBD seem to be the most reliable based on user reviews. for my Build, I got the JK B2A20S20P JK BMS with the following specification:
- 200Ah (I can handle 200Amps current charge or discharge)
- 20S (I can handle up to 20 LifePo4 cells)
- 2A balancer ( It has the ability to balance any of the cells that require balancing - more of that later) - Ring Wire Terminal: This is one of the little but very useful things required for a successful battery build. The ring terminal is what connects your BMS to each cell that makes up your battery. The terminal connects to the positive of each of the cell terminals. I got this 1/4" or 6.35 mm ring terminal from Amazon US. I think you can find 6.35 ring terminals from electrical shops in Nigeria and you can also find them on Aliexpress.
- Wire Crimpers: This tool allows you to easily crimp wires to lugs. For my battery build, I got 2 types of Crimpers. 1 for crimping between 0.5mm2 - 6mm2 Wires and the second for a more heavy gauge lug. 16mm2 to 70mm2 cables. The second in my case is a hydraulic crimp. Here is a video of how I use them for crimping. Both types of wire crimpers can be had in Nigeria.
- Wire Stripers: This is a very important tool that allows for a clean striping of wire insulation. I got this from a local electrical store in Nigeria.
- DC Power Supply: This device is important to help you to balance your battery bank. The general concept behind top balancing is to have all the individual cells that make up your battery bank to be at the same state of charge - you basically want them to be at 100% capacity - so that they can all operate effectively as a unit. The DC power supply is an appliance that can convert AC to DC. It is used to pre-charge the battery cells before you assemble them into a bank. I got this DC Power Supply from Amazon US. Similar systems are available on Aliexpress.
They are some vendors in Nigeria who sell power supplies with high-charging Ampage designed specifically for balancing lifePo4 cells.
I also recommend the ZKE Smart Battery Tester. I used them for my second battery build and they made my job very easy. You can connect them to a laptop to monitor the charging process and they are programmable. You can see the review here. They don't come cheap though. You can get them in 40A or 20A
The important thing to note about the required DC power supply is, you need a unit that can charge at low voltage. Remember the cells are 3.2v so an appropriate unit should have an operating voltage starting from 2v.
This Video explains the Top Balancing Procedure and the role the DC Power Supply plays. - DC Multimeter - Digital Clamp Meter. This is very important for any battery work. It helps to give you an independent source of reference when testing cell voltage and the amount of current passing through a circuit. LifePo4 is very voltage sensitive. You can easily damage them permanently at the slightest overvoltage. Your meter would ensure that you can check the voltage of the cells to verify the voltage of the BMS or DC Power supply.
I got the Klein Tools CL390 from Amazon US. The Uni-T UT210E is cheaper also a good alternative and can be had from Aliexpress. - Other things required for a build can be gotten locally. You would need a furniture person to help with the battery box. You would also need cables and lugs to connect your battery to your inverter / solar charge controller.
Additional Resource
Member discussion